Are you ready to unlock the power of secure remote access to your Internet of Things (IoT) devices? Understanding and implementing Secure Shell (SSH) is not just a technical advantage; it's a fundamental requirement for anyone serious about managing and securing their IoT infrastructure.
The world of IoT is rapidly expanding, connecting devices across homes, industries, and even entire cities. As the number of connected devices grows, so does the need for secure and efficient management. That's where SSH comes in. SSH, or Secure Shell, is a cryptographic network protocol that allows users to manage and access devices securely over an unsecured network. It creates a secure channel for communication, encrypting the data transmitted between your device and the remote server. This is essential to protect sensitive data and commands from interception.
Before diving into the specifics, let's establish a clear understanding of why this matters. Imagine a scenario where you need to update software on a fleet of sensors deployed across a vast area, or perhaps troubleshoot a malfunctioning device from a remote location. Without secure remote access, you're potentially exposing your devices to security threats. SSH offers a solution, allowing you to perform these tasks securely, efficiently, and from anywhere in the world.
Enabling SSH on an IoT device involves a few key steps. First, you need to ensure that SSH is installed on your device. Many IoT devices, like Raspberry Pi and ESP32, come with SSH pre-installed. If not, you can typically install it using package managers like `apt` (Debian/Ubuntu) or `yum` (CentOS/Fedora). Once installed, you'll need to configure SSH by setting up user accounts, passwords, and potentially enabling key-based authentication for enhanced security. These steps are the foundation of a secure remote access strategy.
Once your SSH setup is complete, the real power of this protocol begins to unfold. You can execute commands on your remote devices, manage files, and troubleshoot problems with relative ease. This article serves as your guide to harnessing the capabilities of SSH for remote IoT device management, ensuring secure communication and simplifying the complex process of managing your devices from afar.
Essential SSH Commands for Every Remote IoT User
Mastering a few essential SSH commands is crucial for effective remote IoT device management. These commands are your primary tools for interacting with your devices. To establish an SSH connection, youll use the following command structure:
ssh [user]@[ip_address_or_hostname]Replace `[user]` with the username you wish to connect with and `[ip_address_or_hostname]` with the IP address or hostname of your IoT device. For example, if your username is "pi" and the IP address of your Raspberry Pi is 192.168.1.100, the command would be: `ssh pi@192.168.1.100`
Here are some of the most crucial commands:
- ls: This command lists the files and directories in your current directory. Use it to see what files are present on your remote device.
- cd: This command changes your current directory. For example, `cd /home/pi/documents` will take you to the documents folder.
- pwd: This command prints the working directory. Useful to confirm where you currently are.
- mkdir: This command creates a new directory. For example, `mkdir newfolder` will create a folder named "newfolder".
- rmdir: This command removes a directory. Be cautious with this! It deletes the directory if it's empty.
- rm: This command removes a file. Use with caution!
- cp: This command copies files or directories. For example, `cp file1.txt file2.txt` will create a copy of file1.txt named file2.txt.
- mv: This command moves or renames files or directories. For example, `mv oldname.txt newname.txt` renames a file, and `mv file.txt /home/pi/documents` moves a file to the documents folder.
- nano / vim / other text editors: These are text editors you can use to edit configuration files or other text-based files directly on the remote device. For example, `nano /etc/network/interfaces` allows you to edit your network configuration.
- reboot: This command reboots your device. Useful when you need to restart your device remotely.
- shutdown: This command shuts down your device. Use with caution!
- ping: This command checks if your device is reachable over the network. For example, `ping 192.168.1.100`.
These are just a few of the many commands available. With practice and experience, you'll discover more advanced techniques, but these essential commands will get you started.
Prerequisites for SSH Remote IoT Device Management
Before you begin setting up SSH for your IoT device, it's essential to ensure you have the proper prerequisites in place. This includes having the necessary hardware, software, and network configurations. Here's a checklist of what you need:
- An IoT Device with SSH Support: Common examples include Raspberry Pi, ESP32, or any other device running a compatible operating system.
- Network Connectivity: Your IoT device needs to be connected to a network (either wired or wireless) and have a valid IP address.
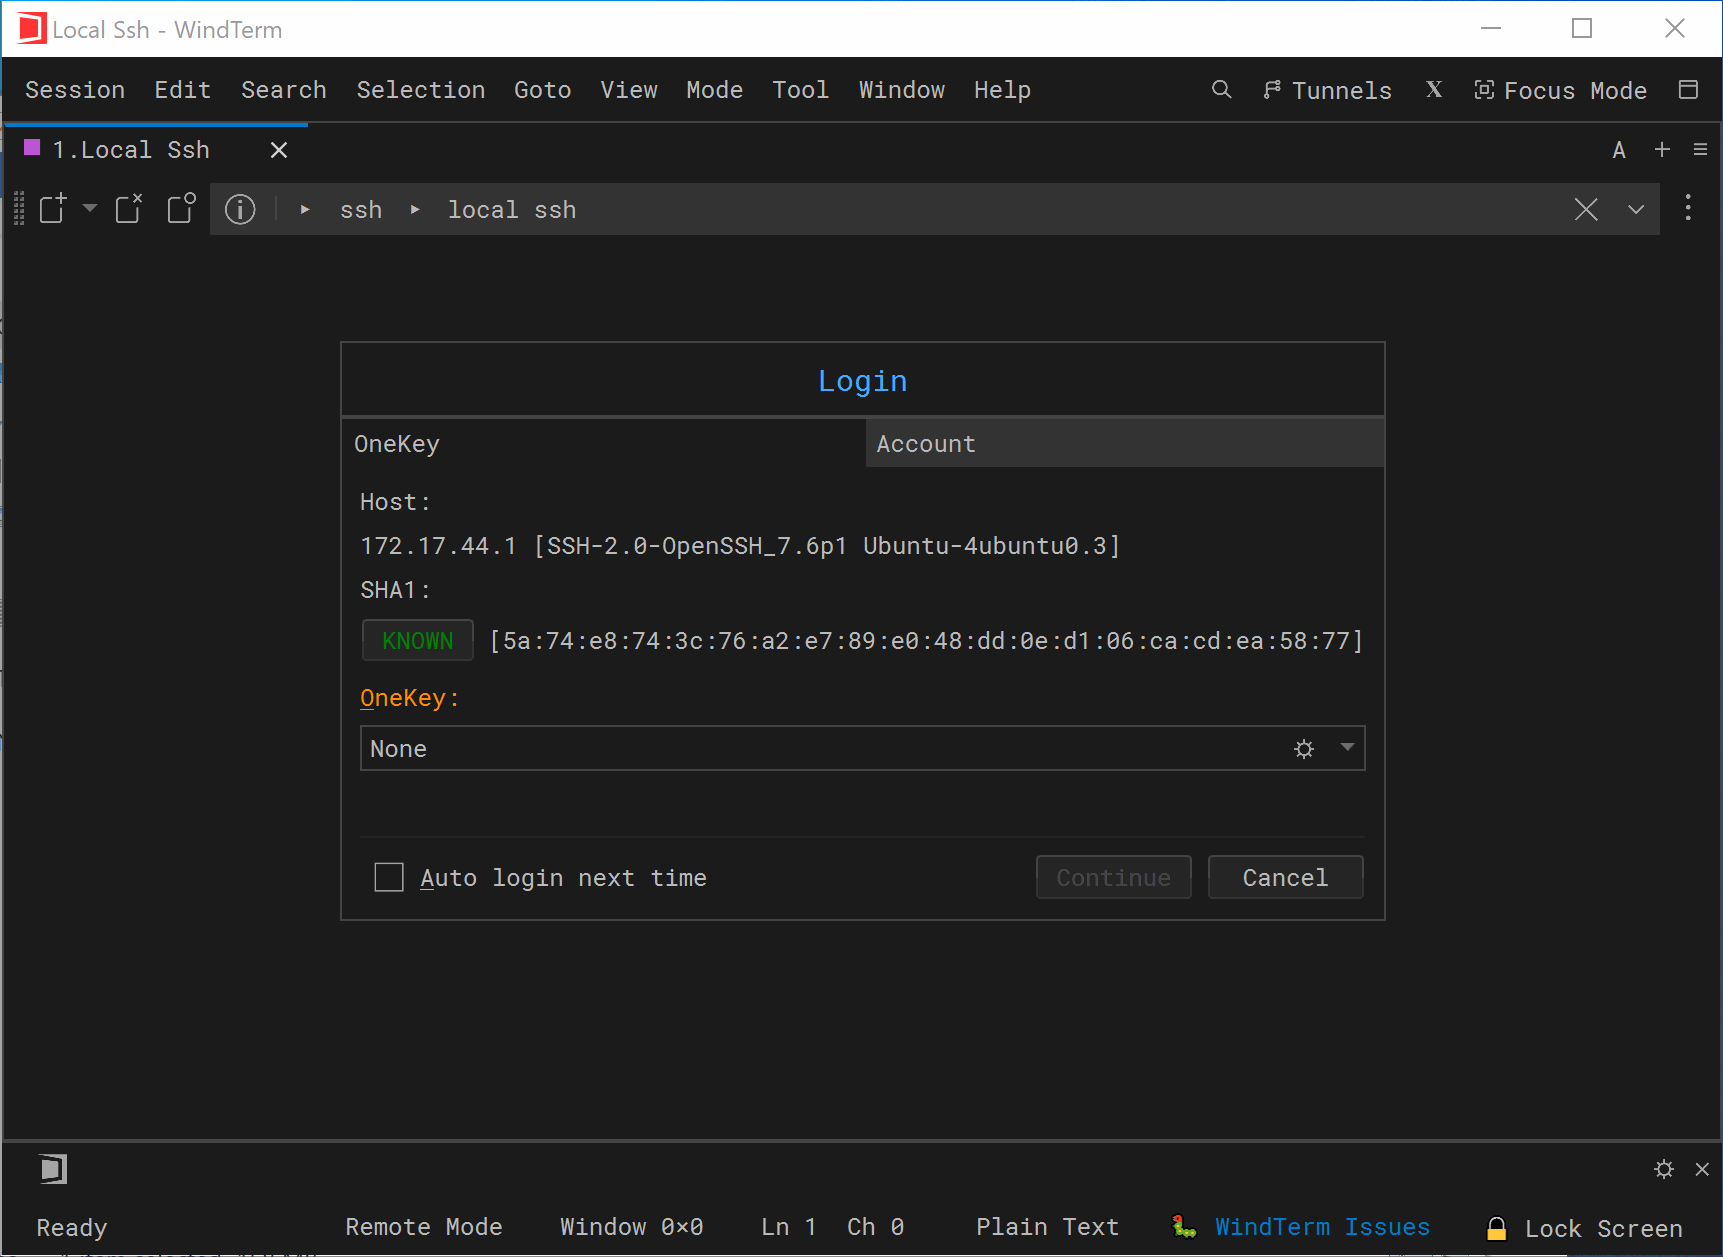
- SSH Client: You'll need an SSH client on your computer. Most operating systems (Linux, macOS) have built-in SSH clients. Windows users can use the command prompt, PowerShell, or a dedicated client like PuTTY.
- User Account: You'll need a user account with appropriate permissions on the IoT device.
- Basic Networking Knowledge: Understanding IP addresses, subnets, and firewalls is helpful.
Meeting these prerequisites will ensure a smooth setup and management process. If you're unsure about any of these steps, don't worry. There are plenty of online resources and tutorials to guide you through the process.
Setting up SSH on your IoT Device
The process of enabling SSH on an IoT device varies depending on the device and operating system. However, the core principles remain the same. Here's a general outline:
- Check if SSH is Installed: Many IoT devices come with SSH pre-installed. You can check by opening a terminal and typing `ssh`. If SSH is installed, you'll likely see a response indicating its version and usage.
- Install SSH (If Necessary): If SSH is not installed, use your device's package manager. For example, on a Raspberry Pi running Raspbian, you would typically use:
sudo apt updatesudo apt install openssh-server - Enable SSH Service: The SSH service needs to be running for you to connect. On most Linux-based systems, the service starts automatically. You can check its status using:
If the service isn't running, start it with:sudo systemctl status ssh
And to enable it to start on boot:sudo systemctl start sshsudo systemctl enable ssh - Configure SSH (Optional): You can configure SSH by editing the `sshd_config` file (usually located in `/etc/ssh/sshd_config`). This allows you to customize settings like port numbers, authentication methods, and security protocols.
sudo nano /etc/ssh/sshd_config - Firewall Rules: Ensure your firewall allows incoming SSH connections on port 22 (or the port you've configured).
- Test the Connection: Once SSH is set up, test it by trying to connect from your computer using the command:
ssh [username]@[ip_address_of_your_device]
These steps provide a fundamental approach to setting up SSH, but the exact commands and configurations can vary. Refer to your device's documentation for detailed instructions.
Enhancing Security: Best Practices for SSH
Securing your SSH connection is paramount, especially when managing IoT devices. Here are some critical best practices to follow:
- Change the Default Password: This is the first and most important step. Default passwords are easy to guess.
- Use Strong Passwords: Use complex, unique passwords or passphrases with a mix of uppercase, lowercase letters, numbers, and symbols.
- Disable Password Authentication (and use key-based authentication): This is a more secure method. Generate an SSH key pair (public and private) on your client machine, and add the public key to your IoT device. This removes the need for a password.
- Change the Default SSH Port: The default SSH port (22) is well-known and often targeted by attackers. Changing the port makes your device less vulnerable to automated attacks.
- Limit Login Attempts: Configure your SSH server to limit the number of failed login attempts to prevent brute-force attacks.
- Use Firewall Rules: Configure your firewall to only allow SSH connections from specific IP addresses.
- Keep Software Updated: Regularly update your IoT device's operating system and SSH server software to patch security vulnerabilities.
- Monitor Logs: Regularly review SSH logs (usually found in `/var/log/auth.log` or similar) for suspicious activity.
By implementing these security best practices, you can significantly reduce the risk of unauthorized access to your IoT devices.
SSH and Remote IoT Platforms
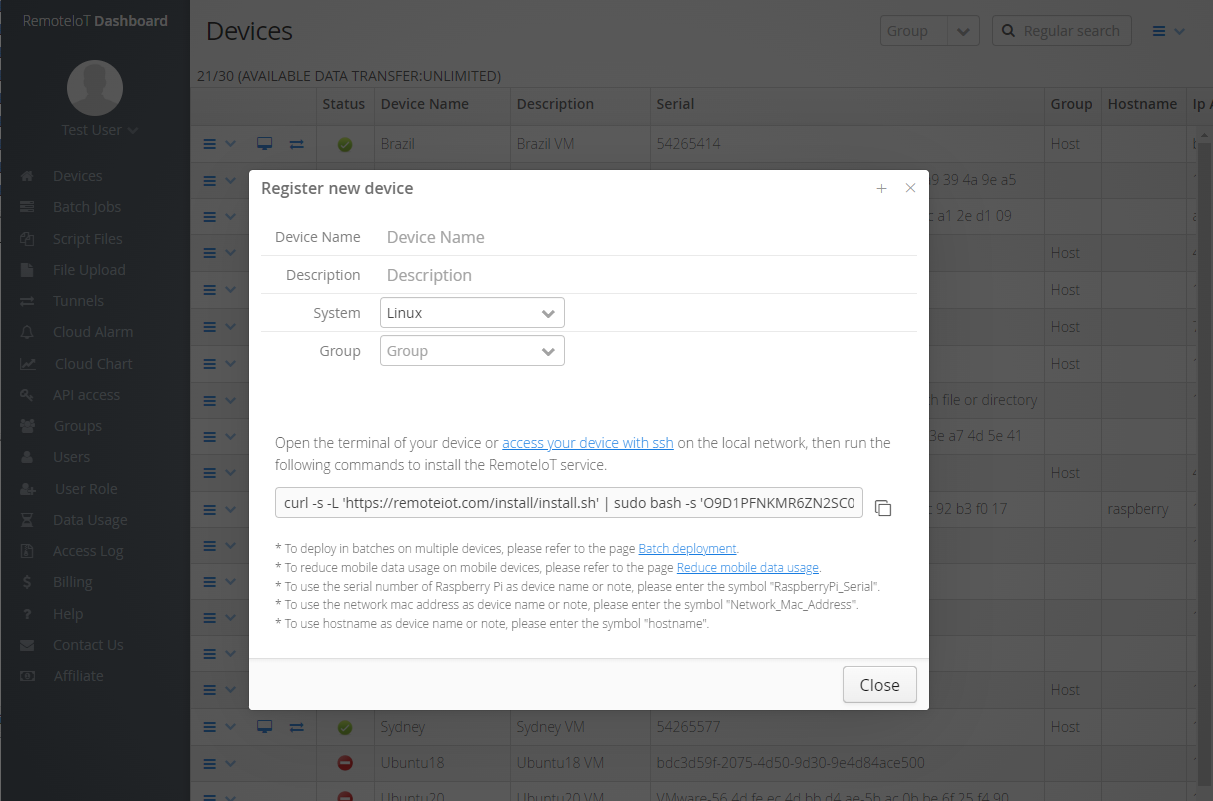
The rise of remote IoT platforms is transforming how developers and IT professionals manage their devices. These platforms provide a centralized location for managing your devices, including using SSH. One significant advantage is the ability to access your devices via an SSH client directly within a web browser. You can connect to your IoT devices from anywhere with an internet connection using a standard web browser. The remoteiot web SSH client can access IoT devices from anywhere via a standard web browser. You can follow the steps below to access your IoT or Raspberry Pi device from a browser.
The benefits of using a remote IoT platform include:
- Simplified Management: Centralized dashboards offer a clear overview of your devices, with all the information and tools you need in one place.
- Enhanced Security: Built-in security features and access control to protect your devices.
- Remote Access: Secure remote access to your devices from any location.
- Monitoring and Alerting: Monitor device performance and receive alerts when issues arise.
Practical Remote IoT Web SSH Examples
Let's look at some practical examples of using SSH in an IoT context. These examples will demonstrate how to use your knowledge to manage your devices effectively.
- Updating Firmware: Use SSH to connect to your device and then execute the commands to download and install the latest firmware. This can be done from anywhere with an internet connection.
- Troubleshooting Sensor Data: Connect to your device and check the data logs to find the reason for sensor readings.
- Deploying Software: Install and configure software applications on your IoT devices by connecting through SSH.
- Configuring Network Settings: Set up or modify network settings, which can be crucial when you need to deploy devices in a new environment.
These examples illustrate how to apply SSH in remote IoT environments, which can be a time and cost saver.
Implementation Best Practices
Following implementation best practices helps to streamline your management process. Some of the best practices are:
- Plan your setup: Think about what you need to set up on your device. Decide on the user accounts, the SSH port number, and what type of security you'll use.
- Automate Tasks: Automate repetitive tasks using scripting or configuration management tools to save time and reduce errors.
- Document your setup: Keep detailed records of your SSH configuration, device settings, and any specific customizations.
- Regularly review your security settings: Regularly check your security settings to ensure they are up to date and secure.
- Use version control: This can help with management and troubleshooting and can make it easier to roll back changes if something goes wrong.
These practices can significantly improve your efficiency and security.
Detailed Technical Guidance
Let's get into some detailed technical guidance.
1. Generating SSH Keys: Use this command in your terminal:
ssh-keygen -t rsa -b 4096ssh-copy-id [user]@[ip_address_or_hostname]2. Configuring Firewall: Configure your firewall to allow incoming SSH connections. On `ufw` (Uncomplicated Firewall) use the following command:
sudo ufw allow ssh3. Monitoring SSH Logs: Use this to monitor the logs:
tail -f /var/log/auth.log
The Importance of SSH in Remote IoT Access
SSH is not just an added feature, it's a fundamental component of any secure and efficient remote IoT access strategy. Without SSH, your devices are vulnerable to attacks and difficult to manage. Secure Shell provides a secure channel for communication, encrypting the data transmitted between your device and the remote server. This is essential to protect sensitive data and commands from interception. Remote IoT device SSH not only ensures secure communication but also simplifies the process of managing IoT devices from afar. SSH transforms remote management from a complex, potentially dangerous process into a secure, streamlined operation. This has led to a paradigm shift in device management.
Key takeaways
By the end of this guide, you'll have the knowledge and tools to configure SSH for remote access to your IoT devices. Whether you're a developer, IT professional, or hobbyist, this guide will provide valuable insights into setting up and maintaining secure connections. Let's dive in and explore how you can ensure your devices remain safe and accessible from anywhere in the world. Mastering these commands is crucial for efficient SSH remote IoT device management. Remote IoT device SSH not only ensures secure communication but also simplifies the process of managing IoT devices from afar. This article will delve into the intricacies of using SSH with IoT devices, providing practical insights and actionable tips for effective implementation.
Throughout this comprehensive guide, we've examined practical remote IoT web SSH examples, discussed implementation best practices, and provided detailed technical guidance. With each step, you've gained the knowledge to build a robust and secure IoT ecosystem.

Detail Author:
- Name : Brody O'Keefe Jr.
- Username : dameon64
- Email : emard.curtis@yahoo.com
- Birthdate : 1987-07-19
- Address : 39694 Wuckert Mountains Apt. 045 Baumbachmouth, DE 98916
- Phone : 520.277.6538
- Company : Rolfson-Gleason
- Job : Transformer Repairer
- Bio : Hic molestias a in inventore odit ullam sunt. Voluptas et est commodi libero consequatur.
Socials
twitter:
- url : https://twitter.com/ebartoletti
- username : ebartoletti
- bio : Quod rerum corporis est quo nostrum alias dolorem. Cupiditate quidem voluptatem placeat. Sit delectus dolor est nemo doloribus qui fugiat.
- followers : 1119
- following : 1464
linkedin:
- url : https://linkedin.com/in/ebartoletti
- username : ebartoletti
- bio : Praesentium nam eveniet velit voluptatibus.
- followers : 806
- following : 738
instagram:
- url : https://instagram.com/bartoletti2004
- username : bartoletti2004
- bio : Cum excepturi natus accusamus perspiciatis. Quas ut sed autem cum enim sed molestias quia.
- followers : 346
- following : 2662
